Campaign Workspace
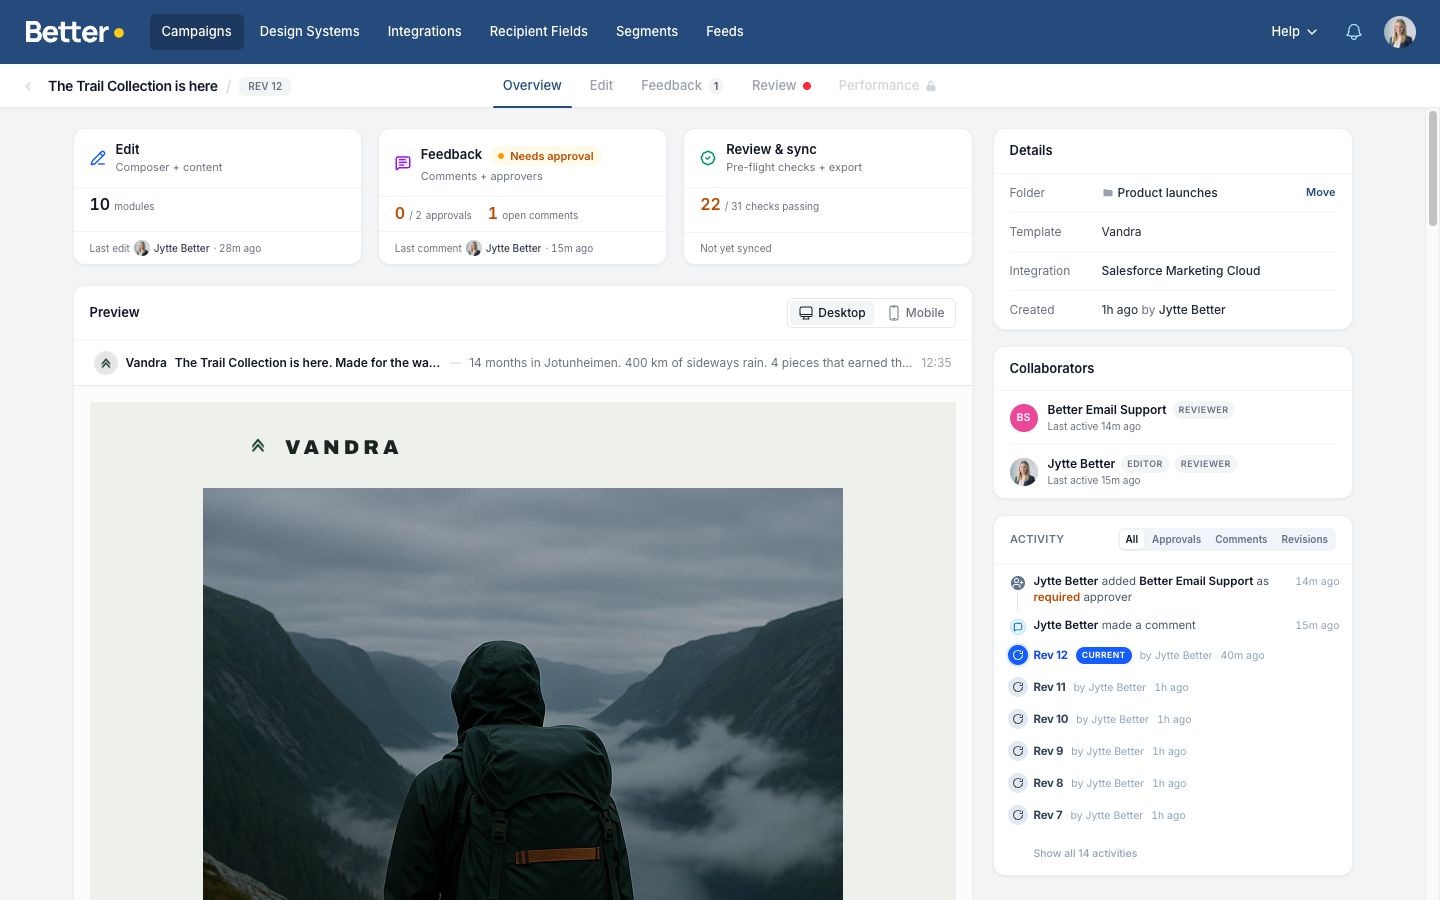
Every campaign opens in its own Workspace — a single page that brings building, feedback, and sending together. Each tab is purpose-built for a different stage of the campaign, so the whole team can work on the same campaign without stepping on each other.
What each tab is for
| Tab | Use it to… |
|---|---|
| Overview | See where the campaign stands at a glance — open comments, approver progress, and review readiness |
| Edit | Build and change the campaign — add modules, edit copy, tweak the design |
| Feedback | Leave pinned comments and manage approvers |
| Review | Run pre-flight checks and sync to your ESP |
| Performance | See how the campaign performed after it was sent |
Feedback and Review are easy to mix up. Feedback is where people give feedback. Review is the final check before export — content checks, comment resolution, required approvals, and export readiness.
Revisions
A revision is an explicit snapshot of the campaign. Create one from the Edit toolbar with Create revision N (or press ⌘/Ctrl+S when a new revision is available).
Revisions are the rhythm of the Workspace:
- Comments are anchored to the revision they were created on, so older threads stay readable as the campaign evolves.
- Approvals are tied to a specific revision. When a new revision is created, prior approvals become stale and approvers can re-approve.
- Review evaluates export readiness against the latest revision.
If you keep editing without snapshotting, the Workspace shows a draft ahead warning. Create a new revision before requesting approval so approvers see the latest content.
Overview at a glance
The Overview tab is the campaign's home page. It surfaces:
- the latest revision and whether the draft is ahead
- open comment count
- approver progress (required and optional)
- review readiness — whether content checks pass and the campaign is ready to sync
Use Overview to decide what to do next without having to open each tab in turn.
Subject line and preheader
For integrations that support native subject and preheader fields, the Workspace shows an inbox-style subject and preheader row at the top of the campaign.
Use the Edit tab to manage these fields:
- Open the campaign in the Workspace.
- Expand the inbox preview row above the campaign.
- Enter the Subject and Preheader.
- Create a revision before review or export, so the final checks use the latest values.
You can use merge tags in these fields, such as [first_name]. Preview profiles show the subject and preheader for the audience you are previewing, and exports render the values in the syntax your integration expects.
When you sync to integrations such as Salesforce Marketing Cloud or Microsoft Dynamics 365 Customer Insights - Journeys, Better Email sends these Workspace values as the email's native subject line and preheader or preview text.
Real-time collaboration
Multiple people can be in the same Workspace at the same time. You'll see other editors' avatars in the toolbar, and changes appear without needing to refresh.
Where to go next
- Campaign Editor — the Edit tab in depth
- Feedback and approvals — how comments and sign-off work on the Feedback tab
- Review & testing — pre-flight checks, test sends, and ESP sync on the Review tab
- Campaign performance — the results that come back after the send
- Campaigns — the high-level campaign model