Custom HTML export
This guide covers Better Email's custom export path for teams that want Better Email to render the final HTML, but will paste, upload, or send that HTML outside a built-in ESP integration.
When to use custom HTML export
Custom HTML export is the right choice when:
- your ESP or delivery tool is not one of Better Email's built-in integrations
- you need final rendered HTML for a manual workflow
- you want to test output without connecting a live ESP account yet
How it works
The custom export integration does not require API credentials.
Instead, it gives you a Better Email integration that can be used for rendered output without any external authentication step.
Important to know:
- Better Email still renders merge tags and integration-specific output based on the integration type you choose.
- The custom integration itself does not push content into another platform.
- This is best for manual copy-paste, manual upload, QA, or unsupported ESP workflows.
Set up the integration in Better Email
In Better Email:
- Go to
Integrations. - Create a new integration.
- Enter a clear name for the integration.
- Choose
Customas the type. - Optional: under
Configuration, turn onSupport subject lineand/orSupport preheader(see below). - Optional: under
Access, restrict the integration to specific users or groups. - Enable the integration.
- Save the integration.
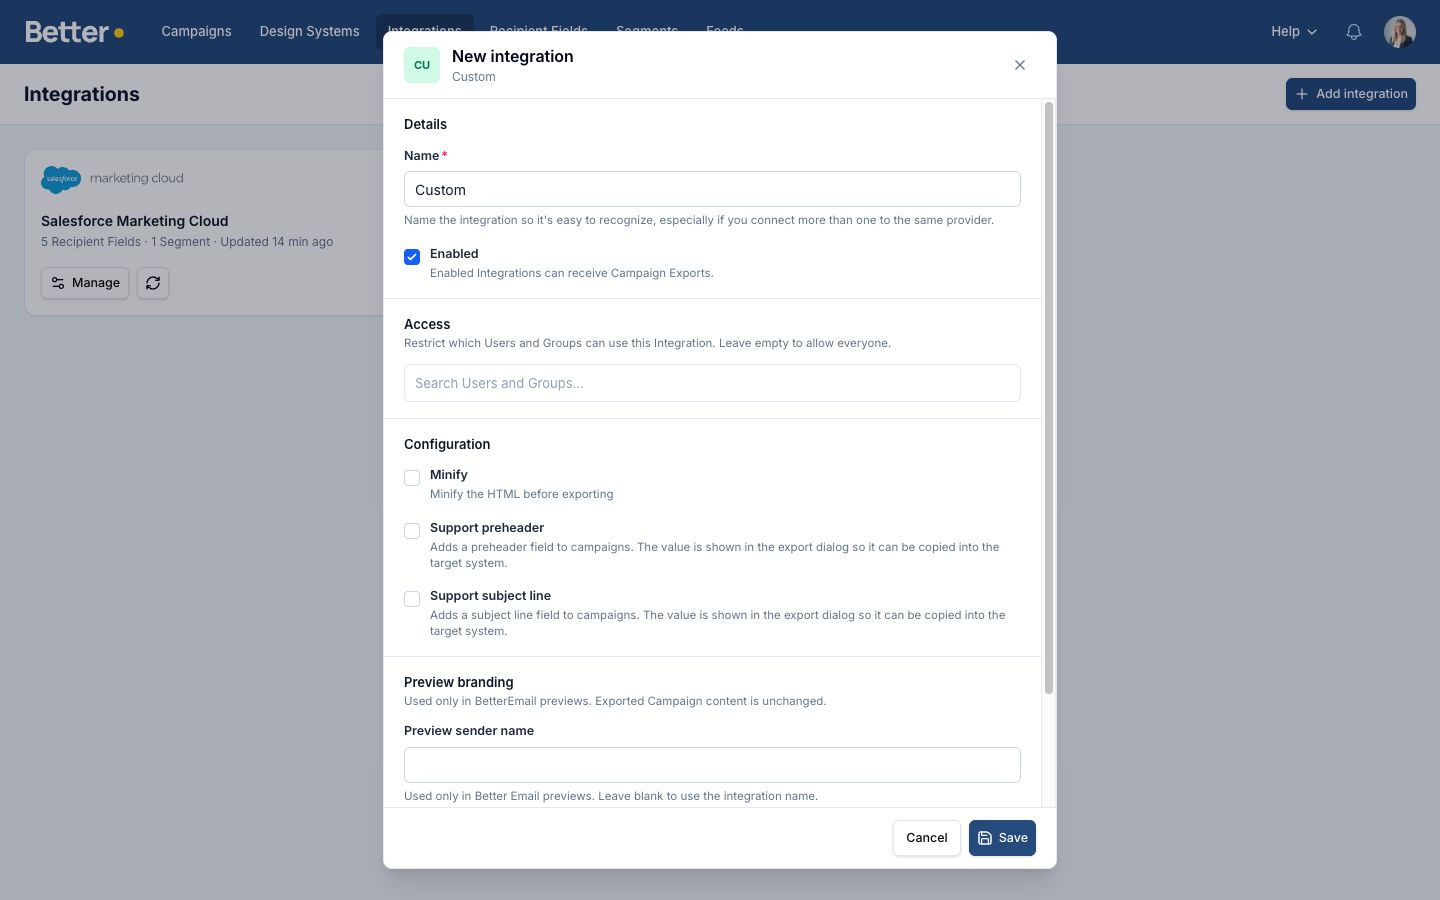
Because no credentials are required, the integration is active as soon as it is enabled.
Subject line and preheader
Most external systems have their own field for the subject line, and often one for the preheader (preview text). A custom integration can't fill those fields for you, but it can manage the values alongside the Campaign so nothing gets lost between Better Email and the target system.
Turn on Support subject line and Support preheader in the integration's Configuration section to enable this. Each toggle works independently — enable only the fields your target system actually supports.
With a toggle enabled:
- The Campaign Editor shows the matching field above the preview, with emoji and personalization-field support, and an inbox-style preview of how the sender, subject, and preheader read together.
- Better Email's pre-flight checks for that field run as part of review (for example subject presence and length).
- The export dialog shows the value next to the
Copy HTMLbutton, with its own copy button, so you can paste it into the target system along with the HTML:
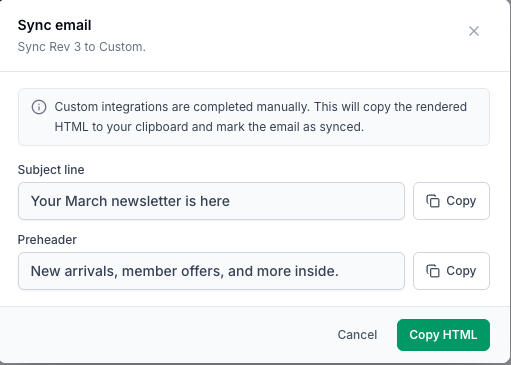
Fields whose toggle is off stay hidden in the Campaign Editor and the export dialog, and their checks are skipped.
Recommended workflow
A good custom-export workflow looks like this:
- Build and review the campaign in Better Email, including the subject line and preheader if enabled.
- Render the final HTML through the custom integration.
- Copy or upload that HTML into the external system you use.
- Copy the subject line and preheader from the export dialog into the matching fields in that system.
- Run the downstream QA you normally use in that platform.