Creating your first template
In this guide, we will go through the concepts relating to templates and how to create your first template and modules.
You do not need to have deep knowledge of HTML, but we will assume that you have a HTML template you can work with.
What is a template?
A template is the layout or skeleton for your email. A design consists of a Template Base and one or more Modules.
The Template Base is the outer wrapper, the static part of every email. Usually it begins with the <HTML> tag, contains a static header, static footer and ends with </HTML>. Inside the Template Base, you have to place a {{content}} Liquid tag that indicates where to insert the dynamic content (the modules).
What is a module?
A Module is a block of content, sometimes also called "blocks" or "modules". When building the template, you define which modules that should be available in the email editor when creating a new email based on the template.
You can create a module in 2 ways.
-
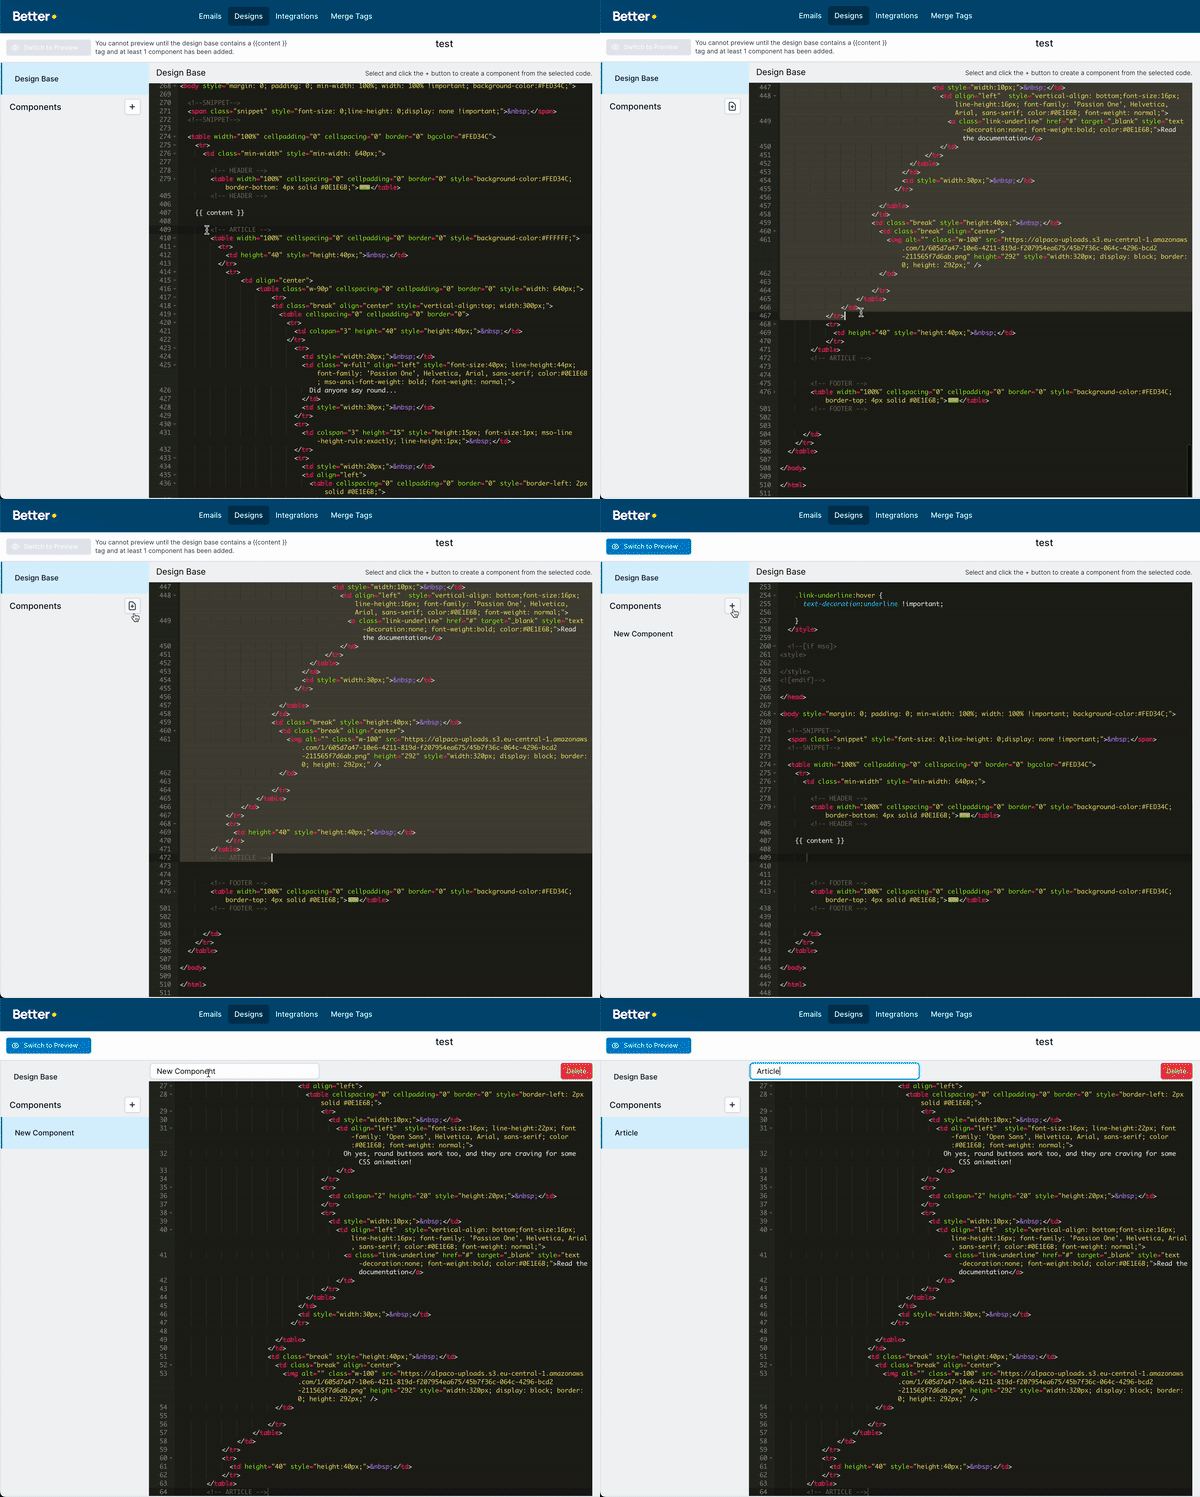
Open the Template Editor. Click the ➕ button next to Modules heading in the left sidebar. Here you can paste in the content, and use it as a module.
-
Open the Template Editor. If you pasted your full template in the Template Base, you can simple highlight the code that represents the new modules and click the ➕ button to Modules heading in the sidebar. A new modules will now be created containing the HTML you selected.
What is a setting?
By default, when you create a new template with modules, there's no editable content, everything is locked down or static. It's your job, as a designer and/or developer, to step by step define what should be editable in the template, and how. For example, in order for the marketeer to enter a " text, you will need to create a setting and input for the title and use the value for that setting in your template HTML.
Read more about settings here.
1. Create a new Template
From the top menu, go to Templates and choose New Template. Give it a name and save it.
Find your new template in the list of designs and go to the Template Editor by clicking ✏️ Edit.
Make sure Template Base is selected in the sidebar. Paste your HTML template into the editor.
In the HTML, locate the beginning of the dynamic section (where your first module or block starts) and add a {{content}} tag in the HTML. This tag tells Better that the modules should be rendered here.
Example
<html>
    <head></head>
    <body>
        <table>
            <tr>
                <td>
                    Header section
                </td>
            </tr>
        </table>
        {{content}}
        <table>
            <tr>
                <td>
                    Footer section
                </td>
            </tr>
        </table>
    </body>
</html>
2. Create a Module
In the Template Base, highlight the HTML of a full module. Usually it will start and end with <table>-tags. When you have highlighted the code, click the ➕ button next to the Modules heading. This will automatically insert the highlighted HTML into the new module and remove it from the Template Base. This is the most convenient way to build an Better template from an existing HTML template.
Alternatively, if you click the ➕ button without highlighting any code, you will get a blank module in which you can write/paste your HTML.
Make sure to give your module a representative name.

3. Create a Setting
Let's make the headline editable in our new module! To do that we have to create a Settings group and one Input in that group.
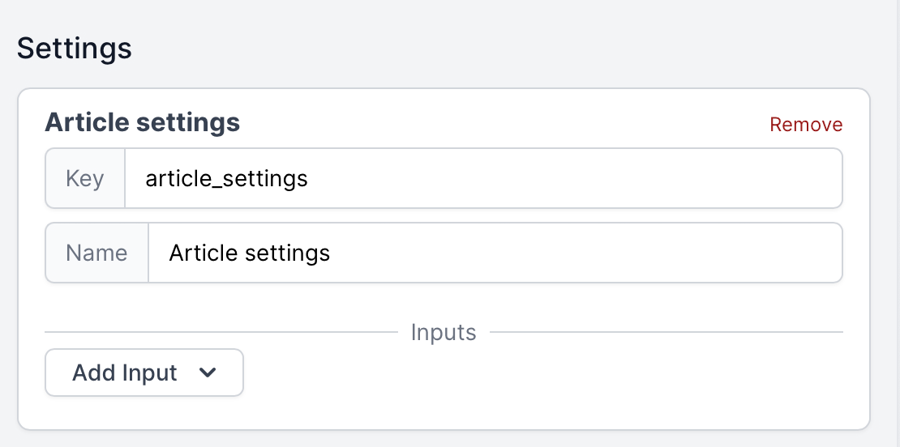
Make sure your new Module is selected in the left sidebar. Go to the right sidebar and Settings tab. Click Add Setting.

The Key is what you will use to reference the settings in your code, and the Name is what will show in the Email Editor.
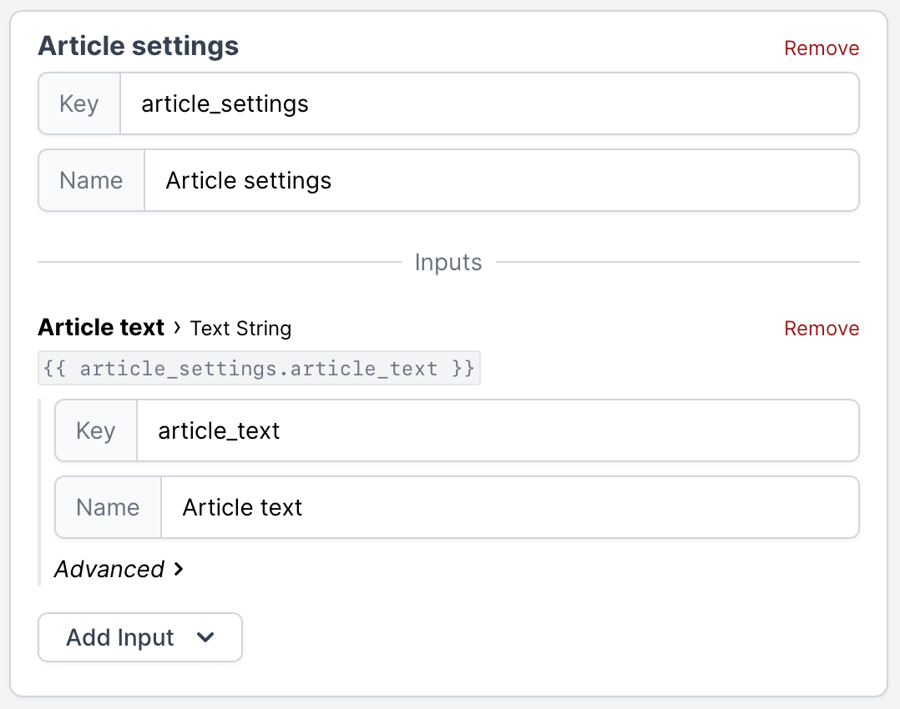
Now add a new Input. Choose Add Input and select Text String. This will add a simple text input field.

Now we have a settings group for the article, and one input within that settings group. Insert the {{ article_settings.article_text }} tag inside your code and it will output the value of this input.
To see it in action, choose "Switch to Preview" in the left side of the editor. Now you are previewing how this module and it's settings will show in the Email Editor. Try to enter something in the Article text input. If you've setup everything correctly, you will see your module preview update with the text from the input.

🥳 Congratulations on learning the basics of Templates! There's much more to dive into, but now you should have an understanding of the basics.